Πώς να καθαρίσετε ένα 3D εκτυπωτή κρεβάτι

Μια γρήγορη απάντηση
| Βήμα | Δράση | Συχνότητα |
|---|---|---|
| Βήμα 1 | Επιθεωρήστε το κρεβάτι για ορατά υπολείμματα και τραχύτητα | Μετά από κάθε εκτύπωση |
| Βήμα 2 | Ξύστε τα υπολείμματα με μια πλαστική ξύστρα. | Κάθε λίγες εκτυπώσεις |
| Βήμα 3 | Σκουπίστε με αραιωμένη ισοπροπυλική αλκοόλη χρησιμοποιώντας 70-90% IPA και χαρτοπετσέτα/πανί μικροϊνών. | Όταν τα υπολείμματα είναι ορατά |
| Βήμα 4 | Εφαρμόστε θερμότητα εάν είναι απαραίτητο για επίμονα υπολείμματα χρησιμοποιώντας τη θερμότητα του εκτυπωτή. | Όσο χρειάζεται |
| Βήμα 5 | Καθαρίστε σε βάθος με IPA υψηλότερης καθαρότητας για λεκέδες χρησιμοποιώντας 90%+ IPA και χαρτοπετσέτα χωρίς χνούδι. | Μηνιαία ή όταν μείζονα ζητήματα |
| Βήμα 6 | Χειριστείτε συσκευές και χημικά με ασφάλεια με κατάλληλο εξοπλισμό ασφαλείας. | Πάντοτε |
Σημείωμα: Αποφύγετε τη χρήση μεταλλικών ξύστρων ή σκληρών χημικών όπως το ασετόν για να αποφύγετε ζημιά στην επιφάνεια του κρεβατιού του εκτυπωτή.
Εισαγωγή
Ο σωστός καθαρισμός των επιφανειών του κρεβατιού του τρισδιάστατου εκτυπωτή είναι κρίσιμης σημασίας συντήρηση που συχνά παραβλέπεται. Ωστόσο, η αποτυχία απομάκρυνσης της συσσώρευσης βρωμιάς, των σωματιδίων υπολειμμάτων και των υπολειμμάτων υλικού μπορεί να υπονομεύσει εντελώς την ποιότητα και την επιτυχία εκτύπωσης ανεξάρτητα από το σχεδιασμό του μοντέλου.

Προβλήματα που προκαλούνται από βρώμικα κρεβάτια τρισδιάστατων εκτυπωτών
Συγκεκριμένα, τι είδους προβλήματα προκύπτουν από την αποτυχία καθαρισμού του κρεβατιού του εκτυπωτή; Υπάρχουν μερικά κοινά:
1. Αποτυχία εκτύπωσης συνημμένων
Τα υπολείμματα που γεμίζουν τη μικροσκοπική υφή του κρεβατιού και τα κενά εμποδίζουν τα μοντέλα να κολλήσουν σωστά. Αυτό προκαλεί την αποκόλληση της εκτύπωσης εν μέρει όταν αφήνουν τα κάτω στρώματα, με αποτέλεσμα ημιτελείς αποτυχημένες εκτυπώσεις.
2. Μειωμένη ποιότητα και αντοχή εκτύπωσης
Τα υπολείμματα βρωμιάς στο στρώμα εκτύπωσης σταματούν τη σωστή συγκόλληση μεταξύ των κατακόρυφων τοίχων και των επάνω στρωμάτων καθώς το αντικείμενο εκτυπώνεται. Μικροσκοπικά κενά σχηματίζονται στην ευθυγράμμιση του στρώματος, μειώνοντας τη συνεκτική αντοχή μεταξύ των στρωμάτων. Αυτό προκαλεί ακατάστατες εκτυπώσεις με κακή ποιότητα επιφάνειας, προβλήματα ακρίβειας διαστάσεων και διακυβευμένη δομική ακεραιότητα.
3. Σταδιακά βουλώνει τα εξαρτήματα του εκτυπωτή
Τα υπολείμματα πλαστικών θραυσμάτων και τα υπολείμματα εκτύπωσης είτε συγχωνεύονται σε άσχημα κάτω στρώματα εκτυπώσεων είτε πέφτουν αργότερα μέσα στο περίβλημα του εκτυπωτή. Αυτά τα κομμάτια στη συνέχεια φράζουν σταδιακά το ακροφύσιο του εκτυπωτή, τον εξωθητή και άλλα εξαρτήματα με την πάροδο του χρόνου, συσσωρεύοντας.
4. Πρόωρη αντικατάσταση κρεβατιού εκτύπωσης
Το αποξηραμένο πλαστικό που έχει κολλήσει έντονα στο κρεβάτι εκτύπωσης σκίζει μικροσκοπικά κομμάτια της ίδιας της επικάλυψης της επιφάνειας εκτύπωσης όταν αφαιρείται με δύναμη μετά την ψύξη. Αυτή η διάβρωση και η διάβρωση βλάπτουν σταδιακά το γυαλί, τις ταινίες ή τα μαγνητισμένα πλαστικά, μειώνοντας τη διάρκεια ζωής τους πριν απαιτηθεί ακριβή αντικατάσταση.
Με τον τακτικό καθαρισμό, οι χρήστες παρακάμπτουν αυτά τα απογοητευτικά προβλήματα που έχουν τις ρίζες τους στην κακή πρόσφυση του πρώτου στρώματος προτού καταστρέψουν τα σχέδια εντελώς ή έμμεσα μολύνουν τους εκτυπωτές. Μια ουγγιά πρόληψης εδώ αποτρέπει τους πονοκεφάλους στο δρόμο.
Πόσο συχνά να καθαρίζετε το κρεβάτι του 3D εκτυπωτή;
Επομένως, το να αφήνουμε το print bed grunge να συσσωρεύεται αμείωτα προκαλεί θλίψη. Τι σημαίνει όμως μια λογική συχνότητα καθαρισμού; Οι συστάσεις διαφέρουν ελαφρώς ανάλογα με τα επίπεδα χρήσης, τους συγκεκριμένους εκτυπωτές και τις ιδιότητες του νήματος:
- Χρήστες φωτός μπορεί να τα βγάλει πέρα με μηνιαίους βαθύτερους καθαρισμούς και γρήγορα σκούπισμα κάθε λίγες εκτυπώσεις.
- Μέτριοι χρήστες θα τα πήγαινε καλά με βαθύτερο καθαρισμό δύο φορές την εβδομάδα και ξεσκόνισμα μετά από κάθε εκτύπωση.
- Βαριά χρήστεςθα πρέπει να εξετάσει το ενδεχόμενο εβδομαδιαίων εκτεταμένων τρίψιμων συν την υποχρεωτική τακτοποίηση της επιφάνειας μεταξύ οποιωνδήποτε εργασιών εκτύπωσης.
Τα βασικά κριτήρια περιλαμβάνουν την εκτίμηση της συσσώρευσης ορατών υπολειμμάτων, την αίσθηση της ανεπτυγμένης τραχύτητας που ανοίγει το κρεβάτι και την παραμονή σε εγρήγορση μετά από αποτυχημένες προσπάθειες εκτύπωσης που αποδίδονται άμεσα σε ορατό εμπόδιο ή ξαφνική ρήξη στο μέσο της εκτύπωσης.
Χρήση πλαστικής ξύστρας για τακτικό καθαρισμό κρεβατιού 3D εκτυπωτή
Για το καθάρισμα περιοδικής συντήρησης μεταξύ των εργασιών εκτύπωσης, η χρήση μιας λεπτής πλαστικής ξύστρας καθιστά το ασφαλές καθάρισμα των υπολειμμάτων απλό, χωρίς να καταστρέφονται οι επιφάνειες, σε αντίθεση με τα μεταλλικά εναλλακτικά. Ακολουθεί μια ήπια διαδικασία για αυτήν την κανονική ανανέωση κρεβατιού εκτυπωτή:
1. Απαλά Βήματα Καθαρισμού
- Αφήστε το κρεβάτι εκτύπωσης να κρυώσει πλήρως αφού αφαιρέσετε ένα ολοκληρωμένο αντικείμενο. Οι ακόμα ζεστές επιφάνειες κινδυνεύουν να λιώσουν πλαστικές ξύστρες.
- Κρατήστε την ξύστρα υπό γωνία 30 μοίρες για να αποφύγετε το σκάψιμο. Εφαρμόστε ελαφριά ακόμη και προς τα κάτω πίεση προς μία κατεύθυνση και ξύστε.
- Εργαστείτε σταδιακά σε όλες τις περιοχές του κρεβατιού με πλέγμα για να καλύψετε τα πάντα μεθοδικά χωρίς να εστιάσετε υπερβολική πίεση σε κανένα σημείο. Απαιτείται αρκετή δύναμη για την απομάκρυνση του υλικού ενώ παράλληλα προστατεύεται η επίστρωση.
- Επιθεωρήστε από πολλές οπτικές γωνίες αφού περάσετε σε ολόκληρη την περιοχή για να πιάσετε τυχόν εναπομείναντα κομμάτια. Στοχεύστε μόνο τα εμφανώς προεξέχοντα υπολείμματα κατά τη διάρκεια αυτής της τακτοποίησης συντήρησης αντί να προσπαθήσετε να αφαιρέσετε όλα τα ίχνη υπολειμμάτων.
- Πάρτε ένα μαλακό στεγνό πανί που δεν αφήνει χνούδι κατά μήκος του κρεβατιού σε περίπτωση που τυχόν κομμάτια υπολειμμάτων ωθηθούν στην άκρη αντί να αποξεσθούν πλήρως κατά τη διάρκεια αυτής της ανανέωσης της επιφάνειας.
Ακολουθήστε αυτά τα μέτρα μετά από κάθε λίγες εκτυπώσεις μεσαίου μεγέθους ως βέλτιστη πρακτική γρήγορης αποκατάστασης επιφανειών. Παραλείψτε τυχόν εμφανώς λείες περιοχές για να ελαχιστοποιήσετε τη φθορά.
2. Αντιμετώπιση Επίμονων Συντριμμιών
Για πραγματικά επίμονα πλαστικά υπολείμματα λιωμένα στην επιφάνεια του κρεβατιού εκτύπωσης, εξετάστε αυτά τα μέτρα πριν καταφύγετε σε πιο καυστικά χημικά μέτρα:
- Επαναλαμβανόμενο ξύσιμο με ρηχή γωνία σε πολλαπλές κατευθύνσεις.
- Θερμάνετε ελαφρά το κρεβάτι εκτύπωσης για να μαλακώσετε το υλικό για ευκολότερη αφαίρεση μέσω απόξεσης.
- Εάν τα υπολείμματα παραμένουν εντελώς άθικτα, δοκιμάστε να τα αφαιρέσετε με πένσα μύτης βελόνας αντί να τα ισιώσετε απλώς στην επιφάνεια του κρεβατιού.
Αποφύγετε την υπερβολική δύναμη κατά το ξύσιμο του πλαστικού, καθώς ορισμένες επικαλύψεις όπως το PEI μπορεί να καταστραφούν σταδιακά με την πάροδο του χρόνου με την επανειλημμένη έκθεση σε τριβή ή αιχμηρά εργαλεία. Αφήστε τη θερμική βοήθεια να αντιμετωπίσει τις δύσκολες σκωρίες αντί να κινδυνεύετε να βλάψετε μόνο μέσω της ωμής βίας.
Διαδικασία βαθύτερου καθαρισμού: Πότε και πώς;
Ενώ η τακτική αφαίρεση βασικών υπολειμμάτων διατηρεί την ποιότητα μεταξύ των εκτυπώσεων, απαιτείται πιο ολοκληρωμένος βαθύς καθαρισμός περιοδικά για να αναζωογονηθεί η πρόσφυση και η απόδοση του κρεβατιού μετά από εβδομάδες χρήσης. Ακολουθεί ένα γενικό πλαίσιο για την αντιμετώπιση αυτής της απαραίτητης αποκατάστασης:
1. Αντιμετώπιση υπολειμμάτων που είναι δύσκολο να αφαιρεθούν
Προγραμματίστε εκτεταμένες συνεδρίες βαθύ καθαρισμού κρεβατιού εκτυπωτή κάθε μήνα για εκτυπωτές μέτριας χρήσης με ελάχιστο ή αμέσως μόλις συσσωρευτούν σημαντικά υπολείμματα, σημαντική τραχύτητα ή διαδοχικές αποτυχημένες εκτυπώσεις που πιθανόν να συνδέονται με τη βρωμιά της πλατφόρμας. Τα βήματα περιλαμβάνουν:
- Περιμένετε να κρυώσει πλήρως το κρεβάτι εκτύπωσης πριν ξεκινήσετε.
- Η αφαίρεση της πλατφόρμας εκτύπωσης από τους εκτυπωτές το επιτρέπει με βάση το συγκεκριμένο μοντέλο σας. Για σταθερά κρεβάτια, προστατεύστε άλλα ευαίσθητα εξαρτήματα, όπως καλωδιώσεις τροχιάς με κολλητική ταινία και χαρτί πριν υγρό καθάρισμα.
- Αναμείξτε ένα διάλυμα καθαρισμού περίπου 90% νερού με 10% ισοπροπυλική αλκοόλη αντί να χρησιμοποιείτε απευθείας αλκοόλ.
- Ρίξτε μια μέτρια ποσότητα στην επιφάνεια του κρεβατιού.
- Αφήστε το να μουλιάσει 5-10 λεπτά. Αυτό επιτρέπει στο υγρό να μαλακώσει και να διαποτίσει τα κολλημένα πλαστικά υπολείμματα.
- Μετά το μούσκεμα, πάρτε νάιλον βούρτσες, χαρτοπετσέτες ποιότητας ή πανιά μικροϊνών σε όλη την πλατφόρμα χρησιμοποιώντας μέτρια δύναμη τρίψιμο για να διαλύσετε και να αφαιρέσετε μηχανικά τη βρωμιά.
- Περιοδικά βρέχετε ξανά τα στεγνά σημεία για μέγιστο αποτέλεσμα κατά το τρίψιμο και στη συνέχεια στεγνώστε καλά την πλατφόρμα μετά την ολοκλήρωση του καθαρισμού.
- Επαναλάβετε τους κύκλους μούλιασης και τρίψιμο, όπως απαιτείται, μέχρι να επιτύχετε το επιθυμητό παρθένο, λείο φινίρισμα του κρεβατιού εκτύπωσης για άλλη μια φορά. Οι πιο σκληρές εφαρμογές χημικών καθαριστικών ή λειαντικών κινδυνεύουν μόνιμη ζημιά, επομένως επιμείνετε στην απαλή αλλά σχολαστική χειροκίνητη αφαίρεση χρησιμοποιώντας υγρά ως μαλακτικό εργαλείο.
2. Αφαίρεση λεκέδων με ισοπροπυλική αλκοόλη
Μπορεί να απαιτούνται ορισμένοι τύποι λεκέδων βαθιάς πήξης χρησιμοποιώντας ισοπροπυλική αλκοόλη υψηλότερης καθαρότητας παρά αραιωμένα διαλύματα. Σε αυτές τις περιπτώσεις:
- Αραιώστε περίπου 99% ισοπροπυλική αλκοόλη 50/50 με νερό.
- Μουσκέψτε τις καθαρές λευκές χαρτοπετσέτες με το μείγμα και στη συνέχεια τοποθετήστε πάνω στις λεκέδες για περίπου 10 λεπτά. Οι χαρτοπετσέτες κρατούν τις υγρές επιφάνειες απομονωμένες.
- Μόλις εμποτιστούν επαρκώς, οι λεκέδες μπορούν να καθαριστούν με σταθερές κινήσεις σκουπίσματος χωρίς να αγγίξετε απευθείας το κρεβάτι.
- Τηρείτε τις προφυλάξεις ασφαλείας όταν εργάζεστε με διαλύτες όπως το αλκοόλ και αποφύγετε την υπερβολική εφαρμογή.
Οι χαρτοπετσέτες αποτρέπουν την άμεση επαφή με ευάλωτες επικαλύψεις κρεβατιού εκτύπωσης έως ότου ο χημικός λεκές ξεπλυθεί εντελώς. Ακολουθήστε τα βήματα ασφαλείας όταν χρησιμοποιείτε διαλύτες.
Επιλέγοντας τα σωστά μέσα και εργαλεία καθαρισμού
Προκειμένου να αποφευχθεί η ζημιά κατά τη γενική συντήρηση ή τον βαθύ καθαρισμό, προσέξτε τα κατάλληλα εργαλεία και χημικά καθαριστικά μέσα που είναι ισορροπημένα για αποτελεσματικότητα και συμβατότητα υλικού κρεβατιού:
- Για λύσεις καθαρισμού ασφαλείς για την επίστρωση, αραιωμένη 10% ισοπροπυλική αλκοόλη με απεσταγμένο νερό αποτελεί μια αποτελεσματική χρήση πιο ήπιας εναλλακτικής έναντι του 100% IPA, αποφεύγοντας παράλληλα τα χλωριωμένα αποθέματα βρύσης κατά την αραίωση.
- Το λευκό αποσταγμένο ξύδι προσφέρει επίσης ήπια καθαριστική δύναμη για ορισμένους τύπους επιφανειών εκτύπωσης, εάν αποφεύγετε το αλκοόλ.
- Οι χαρτοπετσέτες λειτουργούν σε μια πρέζα, αλλά αφήνουν πίσω τους αδέσποτες ίνες και χνούδι. Οι μη βαμμένες μπλε χαρτοπετσέτες καταστημάτων έχουν καλύτερη απόδοση.
- Τα μαλακά πανάκια από μικροΐνες είναι ιδανικές επιλογές σε σχέση με τα παραδοσιακά υφασμάτινα κουρέλια που είναι επιρρεπή σε γρηγορότερο ξέφτισμα και εναποθέσεις υπολειμμάτων.
- Τα λεία πλατιά πλαστικά εργαλεία αφαίρεσης εκτυπώσεων ή οι ράβδοι ανάδευσης βαφής λειτουργούν ως τέλειες ξύστρες κρεβατιού εκτύπωσης σε σύγκριση με τις μεταλλικές σπάτουλες που γυαλίζουν τις επιλογές του κρεβατιού εκτύπωσης από πολυμερές, με επίστρωση πούδρας και υφή σε επαναλαμβανόμενη χρήση, εκτός εάν χρησιμοποιείται τέλεια τεχνική.
- Για βοήθεια στο τρίψιμο, οι μαλακές βούρτσες με λεπτομέρεια από τρίχες αλόγου σε συνδυασμό με διαλύματα διαλύτη/καθαριστικού βοηθούν στην απομάκρυνση των περισσότερων υπολειμμάτων χωρίς αδικαιολόγητη τριβή σε σύγκριση με τις πιο άκαμπτες νάιλον βούρτσες.
Ανεξάρτητα από το ποιες λύσεις καθαρισμού ή εργαλεία επιλέγονται, οι τεχνικές έχουν μεγάλη σημασία. Η υπερβολική δύναμη ή η κακή χρήση ακατάλληλων αναλωσίμων επιδεινώνει τη φθορά στα κρίσιμα μέσα εκτύπωσης κρεβατιού. Ακολουθήστε τις βασικές αρχές, μείνετε σε ήπιες εγκεκριμένες επιλογές όπως 90%+ αραιωμένο νερό IPA και χειριστείτε τις επιφάνειες με λεπτότητα.

Συμβουλές ασφαλείας για επισκευή και συντήρηση
Η εργασία γύρω από ηλεκτρομηχανικές συσκευές απαιτεί την αναγνώριση βασικών βημάτων ασφαλείας για την αποφυγή ζημιών ή σωματικών τραυματισμών που μπορούν να αποφευχθούν:
- Αποσυνδέστε τους εκτυπωτές πριν από διαδικασίες που επιτρέπουν την πλήρη αφαίρεση των εξαρτημάτων για να αποτρέψετε τους κινδύνους κραδασμών ή εμπλοκή με κινούμενα μέρη κατά την επανασυναρμολόγηση.
- Μην ψεκάζετε ποτέ καθαριστικά απευθείας σε ηλεκτρονικές κοιλότητες ή μηχανικές συνδέσεις τυφλά. Χρησιμοποιήστε αντ' αυτού πετσέτες με μέτρια βρεγμένες πετσέτες για μεμονωμένες εργασίες σκουπίσματος.
- Φοράτε προστατευτικά για τα μάτια μαζί με γάντια ανθεκτικά στις χημικές ουσίες όταν χειρίζεστε καθαριστικά όπως αλκοόλ ή οξέα.
- Απορρίψτε τα χρησιμοποιημένα αναλώσιμα καθαρισμού σωστά αντί να επαναχρησιμοποιήσετε απερίσκεπτα τις κατεστραμμένες πετσέτες που ξεφτίζουν, γεγονός που θέτει σε κίνδυνο τη μεταγενέστερη χρησιμότητα.
Η λήψη συνετών προφυλάξεων κατά το χειρισμό μηχανημάτων ρομποτικής επιτρέπει στους χρήστες να επιθεωρούν με ασφάλεια και να αποκαθιστούν τη λειτουργικότητα του εξοπλισμού ακολουθώντας τις βέλτιστες πρακτικές συνήθειες προληπτικής συντήρησης χωρίς να αναλαμβάνουν σημαντικές υποχρεώσεις. Η παράβλεψη βασικών πρωτοκόλλων προκαλεί προβλήματα που μπορούν να αποφευχθούν εύκολα.

Μην παραβλέπετε τον σωστό καθαρισμό κρεβατιού εκτύπωσης για βέλτιστη εκτύπωση
Αν αφήσετε κατά μέρος μια μέτρια αύξηση της συντήρησης στο χρονοδιάγραμμα, μπορείτε να διατηρήσετε τα κρεβάτια τρισδιάστατων εκτυπωτών χωρίς υπολείμματα και να βελτιστοποιήσετε την επιτυχία της εκτύπωσης αντί να διακινδυνεύσετε αποτυχίες που αποθαρρύνουν το ηθικό. Η τήρηση των θεμελιωδών αρχών καθαρισμού με τη χρήση κατάλληλων εργαλείων και μεθόδων έχει μεγάλη σημασία. Αν και σπάνια είναι συναρπαστικό, η διαμόρφωση βασικών συνηθειών υγιεινής κρεβατιού αποδίδει τεράστια οφέλη για τη βελτιωμένη διάρκεια ζωής του εκτυπωτή και την ποιότητα εκτύπωσης μέσω της σταθερής βέλτιστης θερμοπλαστικής πρόσφυσης.
Συχνές ερωτήσεις για τον καθαρισμό κρεβατιού 3D εκτυπωτή
1. Μπορώ να χρησιμοποιήσω οινόπνευμα για να καθαρίσω το κρεβάτι του τρισδιάστατου εκτυπωτή;
Ναι, συνιστάται ισοπροπυλική αλκοόλη (οινόπνευμα εντριβής) αραιωμένη με απεσταγμένο νερό ως αποτελεσματική και ασφαλής λύση καθαρισμού για κρεβάτια με 3D εκτυπωτές. Η καθαρή ισοπροπυλική αλκοόλη μπορεί επίσης να βοηθήσει στην αντιμετώπιση επίμονων λεκέδων. Λάβετε προφυλάξεις ασφαλείας όταν χειρίζεστε συμπυκνωμένο οινόπνευμα.
2. Πρέπει να καθαρίζω τον 3D εκτυπωτή μου μετά από κάθε εκτύπωση;
Όχι, οι χρήστες light μπορεί να χρειάζονται μόνο μηνιαίους βαθύτερους καθαρισμούς σε συνδυασμό με περιστασιακά σκουπίσματα κάθε λίγες εκτυπώσεις όταν είναι ορατά τα υπολείμματα. Οι μέτριοι χρήστες θα πρέπει να καθαρίζουν πιο προσεκτικά κάθε δεύτερη εβδομάδα και να ξεσκονίζουν τυχόν υπολείμματα μετά από κάθε εκτύπωση. Οι συχνοί χρήστες θα πρέπει να καθαρίζουν κάθε εβδομάδα και πάντα μεταξύ των εκτυπώσεων.
3. Μπορώ να χρησιμοποιήσω ασετόν για να καθαρίσω το κρεβάτι του εκτυπωτή 3D;
Όχι, η ακετόνη και άλλοι σκληροί διαλύτες κινδυνεύουν να καταστρέψουν γρήγορα την επίστρωση της επιφάνειας του κρεβατιού εκτύπωσης ανεπανόρθωτα. Για ασφάλεια, κολλήστε σε απαλά διαλύματα ισοπροπυλικής αλκοόλης αραιωμένα με απεσταγμένο νερό κατά τον καθαρισμό.
4. Ποιο είναι το καλύτερο καθαριστικό και πανί για να καθαρίσετε ένα κρεβάτι 3D εκτυπωτή;
Τα καλύτερα καθαριστικά είναι 70-90% αποσταγμένο νερό αραιωμένη ισοπροπυλική αλκοόλη ή λευκό αποσταγμένο ξύδι. Τα λεία μαντηλάκια μικροϊνών ή οι υψηλής ποιότητας χαρτοπετσέτες χωρίς χνούδι συνδυάζονται ιδανικά με διαλύματα καθαρισμού για την αποτελεσματική μετατόπιση των υπολειμμάτων χωρίς να καταστρέφονται τα κρεβάτια εκτύπωσης.
5. Πώς μπορώ να διατηρήσω τον 3D εκτυπωτή μου χωρίς σκόνη;
Κρατήστε τον εκτυπωτή κλειστό, χρησιμοποιήστε φίλτρα αέρα σε επίπεδο επιφάνειας, καλύψτε τον όταν δεν εκτυπώνετε και σκουπίστε τις εξωτερικές επιφάνειες με πανιά ξεσκονίσματος για να μειώσετε τη σκόνη. Αποφύγετε να ψεκάζετε ξεσκονόπανα αέρα ή υγρά απευθείας σε ευαίσθητα εξαρτήματα. Απομακρύνετε τακτικά τυχόν ορατά εσωτερικά συντρίμμια.


 Εκτυπωτής QIDI PLUS4 3D
 QIDI Tech Q1 Pro 3D εκτυπωτής
 Qidi Tech X-Max 3 3D Printer
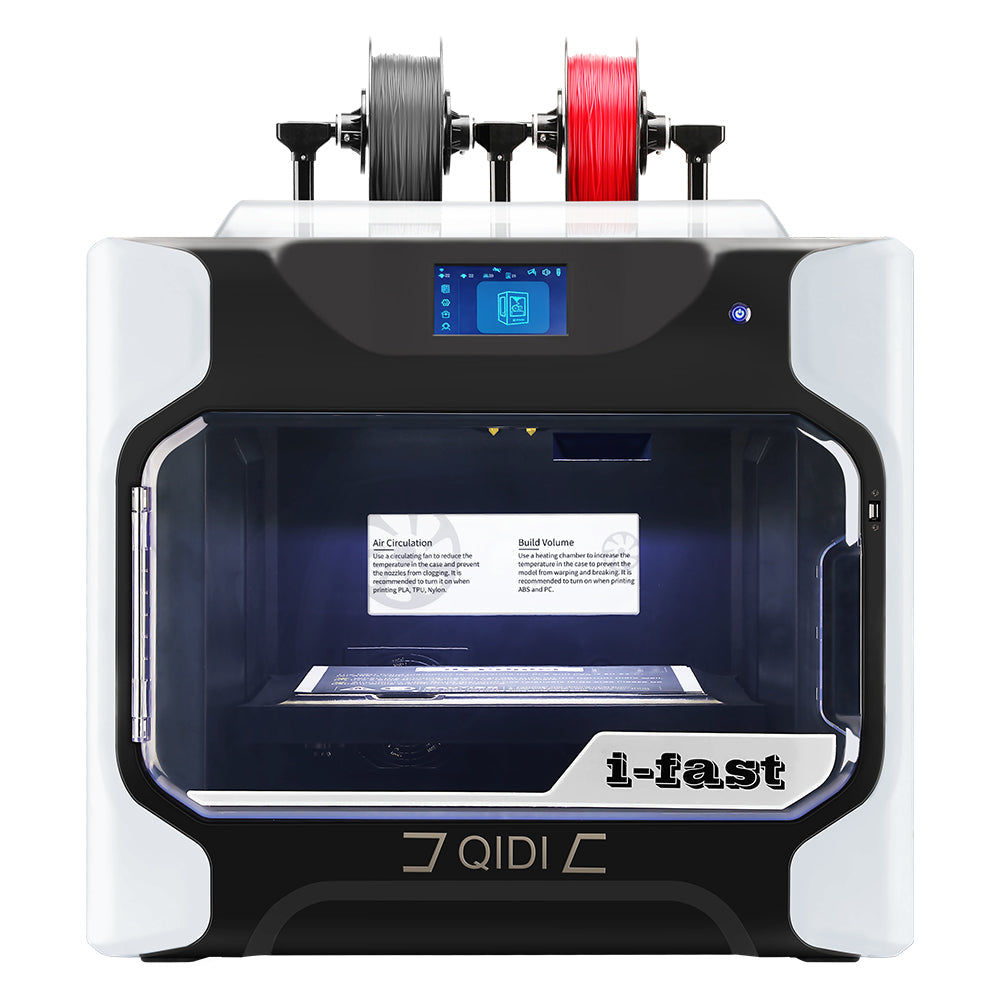
 Qidi I-Fast, πρωτοπόρος στην επίλυση σύνθετων εκτυπώσεων

